Neste post irei
demonstrar como criar um CRUD utilizando Rest e o Oracle JET.
Instalações e configurações necessárias para o Oracle JET:
Passos:
1-) Instalando o
npm:
sudo apt-get install
npm
2-) Atualizar o
nodejs:
sudo npm cache clean -f sudo npm install -g n
sudo n stable
3-) Setup necessário para o OracleJET
sudo npm -g install generator-oraclejet
4-) Criar a estrutura do projeto:
yo oraclejet MyRestTest --template=basic
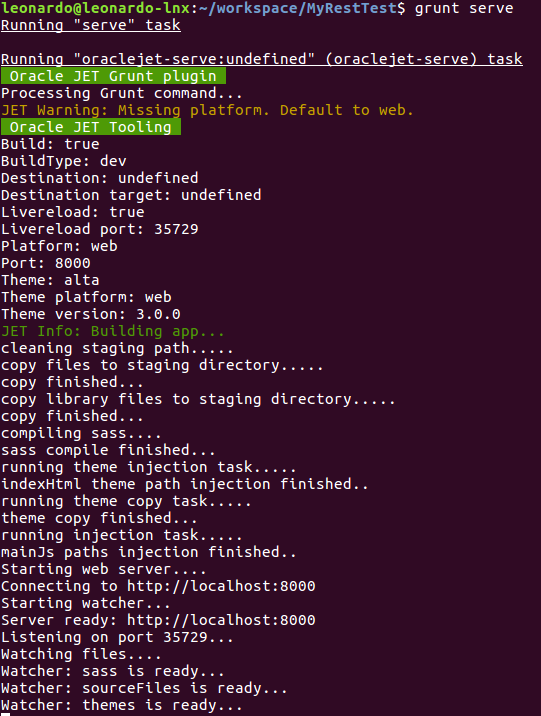
5-) Executando o
projeto
cd MyRestTestgrunt build
grunt serve

Referencia:
OracleJET – Get Started
Com o template
gerado, peguei como referencia o html e o JavaScript do cookbook para
gerar a minha pagina.
O exemplo utiliza
conteúdo estático para o preenchimento da tabela, eu gerei um
serviço Rest, para o CRUD de um contato. Com isso no JavaScript, acrescentei a referencia para a biblioteca 'ojs/ojmodel'.
Caso queira saber
como gerar um serviço Rest, fica o link do post que fiz utilizando o
Spring Boot e o IntelliJ.
ContactController:
package br.com.sugahara.myrestproject.controller;
import br.com.sugahara.MyRestProject.controller.response.Contact;
import org.springframework.web.bind.annotation.*;
import java.util.ArrayList;
import java.util.List;
/**
* Created by leonardo on 20/05/17.
*/
@RestController
@RequestMapping("/contact")
public class ContactController {
private List<Contact> listContact;
public ContactController(){
this.listContact = new ArrayList<Contact>();
listContact.add(new Contact(1, "Nethba","Dadon","+5511999999999"));
listContact.add(new Contact(2, "Sigly","Mitda","+5511888888888"));
listContact.add(new Contact(3, "Maar","Herema","+5511888888888"));
listContact.add(new Contact(4, "Rethelm","Phereal","+5511888888888"));
}
@CrossOrigin(origins = "http://localhost:8000")
@GetMapping("/contacts")
public List<Contact> getContacts(@RequestParam(required=false) Integer contactId){
return listContact;
}
@CrossOrigin(origins = "http://localhost:8000")
@PostMapping("/contacts")
public Contact postContacts(@RequestBody(required=true) Contact contact){
contact.setContactId(listContact.size()+1);
listContact.add(contact);
return contact;
}
@CrossOrigin(origins = "http://localhost:8000")
@PutMapping("/contacts/{contactId}")
public Contact putContacts(@PathVariable("contactId") Integer contactId,@RequestBody(required=true) Contact contact){
contact.setContactId(contactId);
for(Contact c : listContact ){
if(c.getContactId() == contact.getContactId()){
//c = contact;
c.setFirstName(contact.getFirstName());
c.setLastName(contact.getLastName());
c.setCellphone(contact.getCellphone());
break;
}
}
return contact;
}
@CrossOrigin(origins = "http://localhost:8000")
@DeleteMapping("/contacts/{contactId}")
public Integer deleteContacts(@PathVariable("contactId") Integer contactId){
for(Contact c : listContact ){
if(c.getContactId() == contactId){
listContact.remove(c);
break;
}
}
return contactId;
}
}
Contact:
package br.com.sugahara.myrestproject.controller.response;
import java.io.Serializable;
/**
* Created by leonardo on 22/05/17.
*/
public class Contact implements Serializable {
private Integer contactId;
private String firstName;
private String lastName;
private String cellphone;
public Contact() {
}
public Contact(Integer contactId, String firstName, String lastName, String cellphone) {
this.contactId = contactId;
this.firstName = firstName;
this.lastName = lastName;
this.cellphone = cellphone;
}
public Integer getContactId() {
return contactId;
}
public void setContactId(Integer contactId) {
this.contactId = contactId;
}
public String getFirstName() {
return firstName;
}
public void setFirstName(String firstName) {
this.firstName = firstName;
}
public String getLastName() {
return lastName;
}
public void setLastName(String lastName) {
this.lastName = lastName;
}
public String getCellphone() {
return cellphone;
}
public void setCellphone(String cellphone) {
this.cellphone = cellphone;
}
}
Criando a pagina
1-) Crie os diretórios "views" e "viewModels" na seguinte estrutura:

2-) Em views, crie o
arquivo contact.html, com o seguinte conteúdo:
<div id="tableDemo" class="oj-flex oj-flex-items-pad">
<div class="oj-xl-8 oj-lg-8 oj-md-6 oj-flex-item">
<table id="table" summary="Contact List" aria-label="Contacts Table"
data-bind="
ojComponent: {component: 'ojTable',
beforeCurrentRow: currentRowListener,
data: datasource,
columnsDefault: {sortable: 'none'},
columns: [{headerText: 'Contact Id',
field: 'contactId'},
{headerText: 'First Name',
field: 'firstName'},
{headerText: 'Last Name',
field: 'lastName'},
{headerText: 'Cellphone',
field: 'cellphone'}]}">
</table>
</div>
<div class="oj-xl-4 oj-lg-4 oj-md-6 oj-flex-item">
<div class="oj-flex oj-flex-items-pad">
<div class="oj-flex-item deprecated-col-default-width">
<label for="spinnercontrol">Contact Id</label>
</div>
<div class="oj-flex-item deprecated-col-default-width">
<input id="contactIdInput"
data-bind="ojComponent: {
component: 'ojInputNumber',
max: 2000, min: 0, step: 1, value: inputContactId}"/>
</div>
</div>
<div class="oj-flex oj-flex-items-pad">
<div class="oj-flex-item deprecated-col-default-width">
<label for="inputcontrol">First Name</label>
</div>
<div class="oj-flex-item deprecated-col-default-width">
<input id="firstNameInput"
data-bind="ojComponent: {
component: 'ojInputText',
value: inputFirstName}"/>
</div>
</div>
<div class="oj-flex oj-flex-items-pad">
<div class="oj-flex-item deprecated-col-default-width">
<label for="spinnercontrol">Last Name</label>
</div>
<div class="oj-flex-item deprecated-col-default-width">
<input id="lastNameInput"
data-bind="ojComponent: {
component: 'ojInputText',
value: inputLastName}"/>
</div>
</div>
<div class="oj-flex oj-flex-items-pad">
<div class="oj-flex-item deprecated-col-default-width">
<label for="spinnercontrol">Cellphone</label>
</div>
<div class="oj-flex-item deprecated-col-default-width">
<input id="cellphoneInput"
data-bind="ojComponent: {
component: 'ojInputText',
value: inputCellphone}"/>
</div>
</div>
<div class="oj-flex oj-flex-items-pad">
<button id="addbutton"
data-bind="click: addRow,
ojComponent: { component: 'ojButton', label: 'Add to end' }">
</button>
<button id="updateButton"
data-bind="click: updateRow,
ojComponent: { component: 'ojButton', label: 'Update' }">
</button>
<button id="removeButton"
data-bind="click: removeRow,
ojComponent: { component: 'ojButton', label: 'Remove' }">
</button>
</div>
</div>
</div>
3-) Em viewModels
crie o arquivo contact.js, com o seguinte conteúdo:
define(['ojs/ojcore', 'knockout', 'jquery', 'ojs/ojknockout', 'promise', 'ojs/ojinputtext', 'ojs/ojinputnumber', 'ojs/ojtable', 'ojs/ojarraytabledatasource','ojs/ojmodel'],
function(oj, ko, $)
{
function contactViewModel()
{
var self = this;
self.ContCol = ko.observable();
self.datasource = ko.observable();
var contactArray = [];
self.contactObservableArray = ko.observableArray(contactArray);
self.serviceURL = 'http://localhost:8090/contact/contacts';
self.parseContact = function(response) {
return {contactId: response['contactId'],
firstName: response['firstName'],
lastName: response['lastName'],
cellphone: response['cellphone']};
};
self.Contact = oj.Model.extend({
urlRoot: self.serviceURL,
parse: self.parseContact,
parseSave: self.parseContact,
idAttribute: 'contactId'
});
self.myCont = new self.Contact();
self.ContCollection = oj.Collection.extend({
url: self.serviceURL,
model: self.myCont
});
self.ContCol(new self.ContCollection());
self.ContCol().fetch({
success: function(model, response, options) {
for(x=0;x<response.length;x++){
self.contactObservableArray.push(response[x]);
console.log("Load contacts success");
}
},
error: function(model, xhr, options) {
console.log("Load contacts error");
}
});
self.datasource = new oj.ArrayTableDataSource(self.contactObservableArray, {idAttribute: 'contactId'});
/** ADD ROW BUTTON **/
self.addRow = function()
{
var addCon = new self.Contact();
addCon.save({'firstName': self.inputFirstName(),
'lastName': self.inputLastName(),
'cellphone': self.inputCellphone()},{
success: function(model, response, options) {
self.contactObservableArray.push(response);
console.log("Save contact success");
},
error: function(model, xhr, options) {
console.log("Save contact error");
}
});
};
/** UPDATE ROW BUTTON **/
self.updateRow = function()
{
var currentRow = $('#table').ojTable('option', 'currentRow');
var updateCon = new self.Contact();
if (currentRow != null){
updateCon.save({'contactId': self.inputContactId(),
'firstName': self.inputFirstName(),
'lastName': self.inputLastName(),
'cellphone': self.inputCellphone()},{
success: function(model, response, options) {
self.contactObservableArray.splice(currentRow['rowIndex'], 1,response);
console.log("Update contact success");
},
error: function(model, xhr, options) {
console.log("Update contact error");
}
});
}
};
/** DELETE ROW BUTTON **/
self.removeRow = function()
{
var currentRow = $('#table').ojTable('option', 'currentRow');
if (currentRow != null)
{
var destroyContact = self.contactObservableArray()[currentRow['rowIndex']];
var deleteCon = new self.Contact({'contactId': destroyContact.contactId});
deleteCon.destroy({
success: function(model, response, options) {
self.contactObservableArray.splice(currentRow['rowIndex'], 1);
console.log("Delete contact success");
},
error: function(model, xhr, options) {
console.log("Delete contact error");
}
});
}
};
self.inputContactId = ko.observable();
self.inputFirstName = ko.observable();
self.inputLastName = ko.observable();
self.inputCellphone = ko.observable();
}
var cvm = new contactViewModel;
/** CURRENT ROW LISTENER **/
self.currentRowListener = function (event,ui) {
var currentRow = cvm.contactObservableArray()[ui.currentRow['rowIndex']];
cvm.inputContactId(currentRow.contactId);
cvm.inputFirstName(currentRow.firstName);
cvm.inputLastName(currentRow.lastName);
cvm.inputCellphone(currentRow.cellphone);
}
return cvm;
});
4-) Abra o arquivo
index.html e acrescente a div para referenciar a pagina que foi criada.
5-) Teste:


